Tuesday, April 22, 2014

Pullover make-over


This pullover certainly came close to disposal. I bought it at Value Village (where else, right?) for about $7-$8. It was the start of winter and I was looking for something warm to wear around the house, and the orange colour (my favourite!) immediately caught my eye. Unfortunately I discovered I'm not a big fan of pullovers; cardigans are more my thing so I contemplated donating it back to VV. Fortunately, I found a tutorial on how to turn an old pullover into a cardigan over at Happiness is...creating and, well, suffice it to say that this orange number is back in my closet.


I started with the tutorial and added my own embellishments. Instead of seam binding, I used twill tape, which I feel are a little strudier and suited to something I'm going to wear a lot. Since the material is thick cotton wool blend, I would suggest using a tape or ribbon that's at least 1" wide. I also added pockets (for practical reasons!) cut out from an old bed sheet and a heart appliqué (why not, right?) from some left over fabric. The result was a slouchy cardigan I can quickly throw on when I'm curling up on the sofa and take off when I'm doing dishes.

Check out the tutorial and see if you can do this to one of your old sweaters!

Tuesday, April 8, 2014

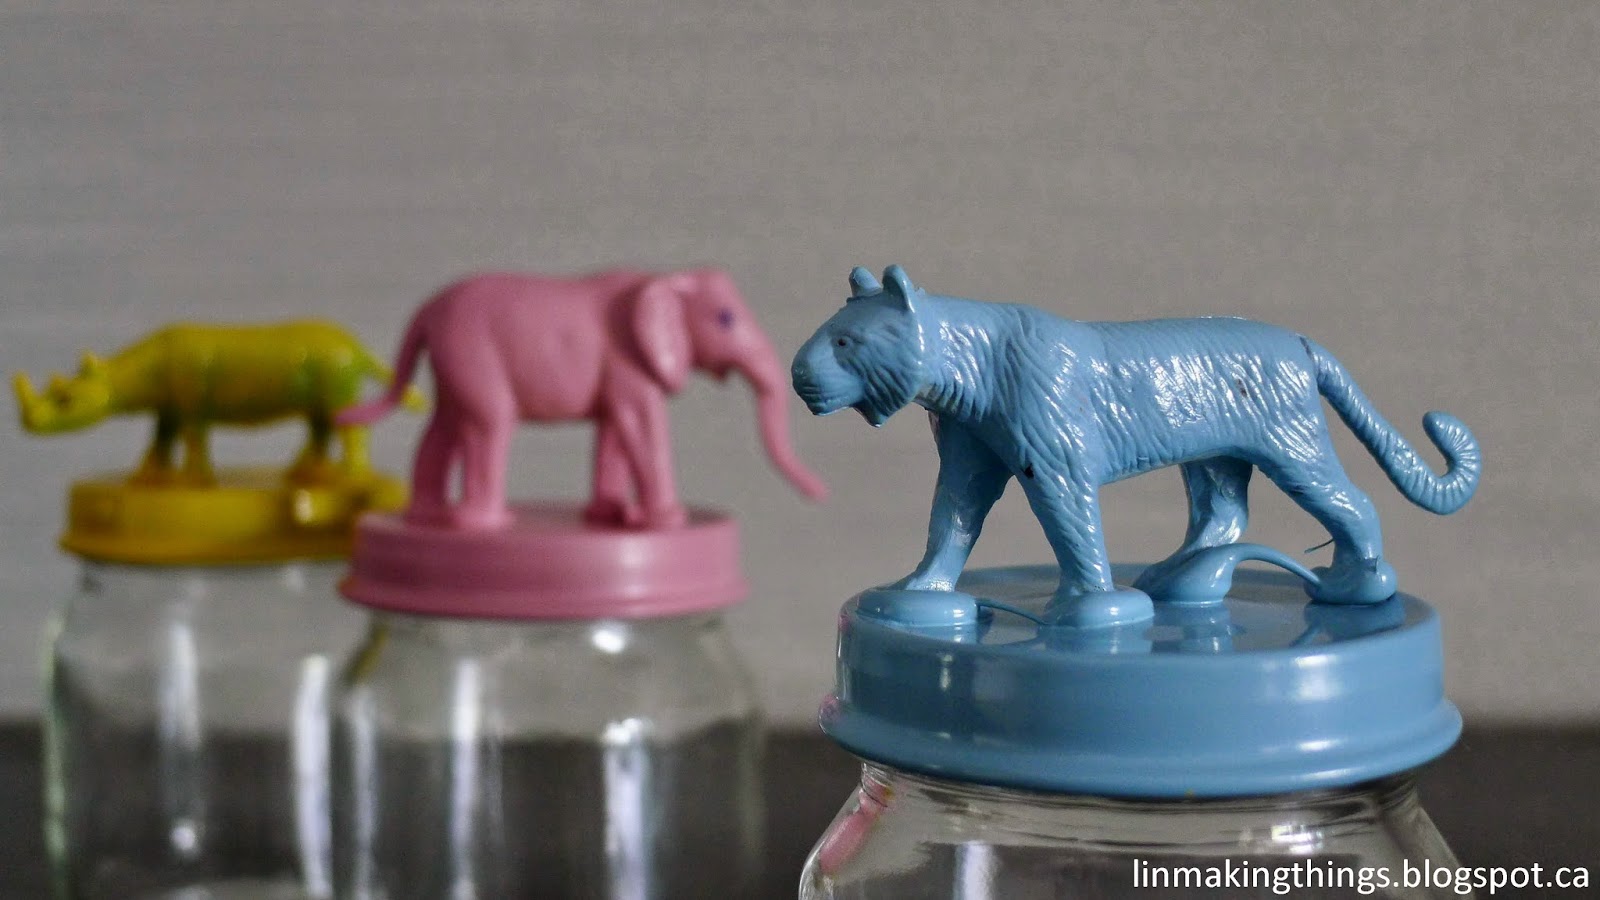
Creature feature jars

Guest post by Nani a.k.a. Crafty Momma

If you're a compulsive jar-hoarder like my sister, you'll like this easy little DIY project.


With a few simple materials and just 30 minutes, you'll have a pretty set of decorative jars that's great for storage or as cute gifts. My sister made hers as a farewell gift and filled the jars with chocolates. You can add a little more feature with complimentary tags or ribbons tied around it.


Read on after the jump for the full tutorial.

Creature Feature jars
What you need:
1. Empty jars
2. Hot glue gun
3. Plastic animals
4. Spray paint


Instructions:
1. Clean your jars and their lids, remove any stickers or residue and wipe dry.
2. Attach the plastic animals onto the lids using your hot glue gun. Let the glue dry completely.


3. Once the glue has dried completely, you can start spray painting the lids with your choice of colours. To get an even and opaque finish, apply 2-3 coats of paint. Alternatively, you can apply a single layer or paint and let some of the animals' texture show through.


4. Let the paint dry completely. Put the lids back onto the jars and voila! You have new upcycled jars.


Have fun making them!

Sunday, March 9, 2014

Bento tote bag


Boy, have I been busy these past few weeks! I've actually been making things in the pockets of time I've had in my busy schedule. I just couldn't find the time to blog about them, which is a tragedy! So here's my first one for March: a bento tote bag!

I found the tutorial for this incredible easy tote bag last year but neglected to note the website or the name of this particular design. I had to do a few hours of online 'investigative research' (re: endlessly scrolling through pictures of DIY tote bag designs) until I found the original blog post. I also discovered that there several different ways of constructing it. Between The Lines calls it the "wings" tote because the construction resembles a pair of wings folded upwards to form a bag. I went with Pretty Prudent's 'bento' tote bag, which I found to be much easier for beginners, but modified it to fit my needs. Check out both their posts to see which method appeals to you.

bag, tote, DIY, fashion, sewing, bento, Lin Making Things

It took me about 30 miniutes to make my first one - which turned out PERFECT! - and I've been using it as my go-to carry-all for a few weeks now. There are a few different ways to construct and finish the bag - lined or unlined; flat, angled or boxed corners; single compartment or with pockets; short or long handles. I chose to line mine with an old bed sheet and finish it with boxed corners and a eight-inch handle from some thick cotton canvas.

bag, tote, DIY, fashion, sewing, bento, Lin Making Things

 The great thing about this bag is that it's easy enough that you could experiment with it on a scaled down version (which is what I did for this tutorial) in order to understand the construction and modify it to suit your taste. Since there are only straight stitches involved, you can certainly spend  a little bit more time hand-stitching the bag if you want.

Check out how you can make this bento tote bag yourself after the jump.

Sunday, February 9, 2014

Masala chai

tea, beverage, masala chai, Indian, recipe, linmakingthings

I love warming up with a hot cup of tea every morning and every time I come out of the cold. Tea is one of those popular beverages that you can find anywhere you go. From China to Morocco to Britain, almost every country on the globe will have its own culture of tea-drinking and special brews. One of the countries I've been admiring from afar for its tea is India, which is second only to China for producing and consuming the most amount of tea in the world. India has a unique tea drinking culture where its tea, or chai in Hindi, is brewed with varying mixes of spices, or masala. There are no hard and fast rule to making masala chai, as there are a multitude of ways to customize your own spice combination. I started off with this masala combination from Manjula's Kitchen and, as usual, tweaked it to fit my pallet.

tea, beverage, masala chai, Indian, recipe, linmakingthings

This recipe will make a spice mix for 10-12 cups of masala chai. You can brew your tea in milk only or a combination of milk and water, which is how I like mine. You can also sweeten it and spice it up to your liking. You can also brew your tea a little longer than 5-6 minutes to get a stronger flavour of the spices. Be careful not to let your tea boil over; once milk has reached its critical boiling point, it can bubble up within seconds boil over. Trust me, you do not want your kitchen smelling like burnt milk!

tea, beverage, masala chai, Indian, recipe, linmakingthings

I grounded my spices in a food processor and then used a pastel and mortar to crush any remaining spices that were still whole. A pastel and mortar is probably more suitable for single-serve spices but if you're making a small batch as I did, go for the food processor or a spice grinder if you have it.

Check out the super easy recipe after the jump.

Saturday, February 1, 2014

Tea towel pillow case

tea towel, pillow case, DIY, tutorial, sewing, linmakingthings, repurpose

It's starting to look as though I've developed an obsession with tea towels, doesn't it? Well, I can't help it! They come in such fun colours and motifs, they're sturdy and their edges are all neatly hemmed. And when they go on clearance at Ikea, tea towels are impossible to resist! They also beat buying yards of fabric only to end up with bits and pieces that I can't really use for anything.


I've been wanting to give my throw pillow a makeover, so when I got these tea towels, I just played around and wrapped one around my pillow. Et voila! I discovered that I can make a pillow case out of this tea towel with just three lines of stitches and a button. It took me less than 30 minutes to make this pillow case. How easy is that?

tea towel, pillow case, DIY, tutorial, sewing, linmakingthings, repurpose

This project is perfect for beginners since you only have to sew a few lines of straight stitches and you don't have to worry about measuring, cutting patterns, serging frayed edges or attaching zippers. It's also completely doable without a sewing machine. Do note, though, that this project requires a tea towel with a built-in loop and it makes a 12"x18" pillow case for a standard throw pillow.

Read on after the jump for the full picture tutorial.

Thursday, January 23, 2014

Onesie dresses - make your own with onesies and fat quarters!
As usual, this DIY is a marriage between some plain items and some unused materials. My mom and I were looking for some baby gifts and we settled on these cute little onesies to make into dresses. Then my mom remembered the set of fat quarters that she never got around to making into a quilt. So I decided try this refashion DIY project and turn the plain onesies into adorable little onesie dresses with the fat quarters.

onesie, dresses, baby dresses, quilting, fat quarters, DIY, linmakingthings

Fat quarters are 18"x22" precut quilting fabric pieces. If you don't have any fat quarters, you can simply cut any fabric of your choice to size. You can also adjust the width and length of the fabric to fit the size of your onesies. I used 9-month for this project.

Read on after the jump for the full photo tutorial.

Saturday, January 4, 2014

Two-toned infinity scarf - from upcycled pashminas


So this is what happens when you buy things on impulse. I wear the hijab and I have a pronounced weakness when it comes to scarves. One of my ongoing quests is to reduce the number of scarves I buy because, really, I don't need that many. These two pashminas are the result of an impulse buy several years back. The colours are pretty but the materials is far too coarse for me to wear around my face so they've been sitting dormant in my drawer.


I decided to turn them into an infinity scarf after stumbling upon a few Youtube tutorials and seeing how easy it is to make one. Plus, I've also been craving for a new infinity scarf since winter set in. The two pashminas combined made a four-layer thick infinity scarf. Two days ago, when temperatures in Toronto dropped to almost thirty below, this scarf did its job in keeping my neck warm and toasty. It also doubled as a heavy hood which didn't flip too easily in gusty winds.

Because of the double layers, there's a few extra steps in this tutorial as opposed to making a regular infinity scarf. You can totally do this with just one pashmina for a thinner infinity scarf. Also, the final step of turning the finished scarf inside out can be a bit nerve-wrecking, but don't panic. Just keeping pulling and it'll all come together at the end!

Check out the full picture tutorial after the jump.

Thursday, December 19, 2013

Jump ring bracelet - 100% thrift store inspired!

linmakingthings, beads, bracelet, jump ring, jewelry, eco-friendly, thrift store, DIY, accessory, Value Village

I have to credit my favourite thrift/beading supply store for this clever and incredibly simple DIY. I bought this cute blue ombre plastic bead necklace from Value Village for $1.99, which is a steal considering how many beads there are on this one necklace. On my next visit I saw this interesting little bracelet made all out of jump rings. I didn't purchase the bracelet because it wasn't entirely to my taste but I took a picture of it so that I can replicate it with my own choice of beads. The project was so much fun and easy to make that I made several in one sitting!

linmakingthings, beads, bracelet, jump ring, jewelry, eco-friendly, thrift store, DIY, accessory, Value Village
 
This is, by far, the easiest jewelry I've made; it didn't need any chains, wires, or crimps. All I used were jump rings in 2 sizes, clasps and beads. If you're a beginner, I would recommend starting with this project to get a hang of handling jump rings and tools like pliers.

Check out the tutorial on how to make this jump ring bracelet.

Wednesday, December 18, 2013

Puzzle trinket box - from repurposed photo frame protective corners

linmakingthings, photo frame, cardboard, DIY, toy, puzzle, trinket, upcycle, repurpose, washi tape

Here's a quick little DIY you can make in about fifteen minutes or less. I repurposed 4 cardboard corners and decorated them with some washi tape and dollar store alphabet stickers. As usual, I've had these photo frame cardboard corners in my scrap box for a while before I discovered what I can do with them.

linmakingthings, photo frame, cardboard, DIY, toy, puzzle, trinket, upcycle, repurpose, washi tape

The four corners fit into each other quite nicely like a puzzle, but one simple enough for my five-year-old niece Zara to solve. Plus, since the puzzle forms a box, I decided to store a little surpirse in it for her!

linmakingthings, photo frame, cardboard, DIY, toy, puzzle, trinket, upcycle, repurpose, washi tape

I added the alphabet stickers so she can disassemble the puzzle and spell her name.

linmakingthings, photo frame, cardboard, DIY, toy, puzzle, trinket, upcycle, repurpose, washi tape

Check out the photo tutorial if you'd like to see how I made this quick but ingenious little DIY!

P/S: I also made a trinket box for my little niece Dina with a used plastic box. Here it is:

linmakingthings, photo frame, cardboard, DIY, toy, puzzle, trinket, upcycle, repurpose, washi tape

Tuesday, December 17, 2013

Miso udon - a warm and hearty noodle soup, Japanese style!

linmakingthings, miso, udon, vegetarian, recipe, Japanese, oyster mushrooms, Asian, umami

As I've warned you before, my udon obsession has just started. I had this miso udon at a cafetaria a while back and I thought it was the perfect comfort food - vegetarian, warm broth, hearty noodles and rich umami flavour. As with most of my recipes, this one takes less than fifteen minutes to cook with minimal preparation.

There are different types of miso - white miso, red miso - and it's made by fermenting soy beans. Miso is relatively salty with a rich back-of-the-pallet flavour which I can best describe as umami. Miso has also been claimed as a superfood; it's rich in protein and the fermentation process fills the miso with live, healthy bacteria. As such, miso shouldn't be overcooked; rather, most recipes I looked at required turning off the heat before finally adding miso.

linmakingthings, miso, udon, vegetarian, recipe, Japanese, oyster mushrooms, Asian, umami

I postponed making this for over a week because I forgot to buy kombu flakes, which I need in order to make dashi stock, which I need to make miso soup. But then I took a closer look at the packaging and I realized that the miso paste I bought already had dashi in it. According to one website, dashi type miso is the best way to make authentic miso soup. Problem solved! So, if you're a beginner like me, I would advice getting dashi type miso and save yourself the extra step of making dashi stock.

linmakingthings, miso, udon, vegetarian, recipe, Japanese, oyster mushrooms, Asian, umami

Miso udon is generally served with just some nori, spring onions and tofu. I wanted to make this into a proper meal so I added some oyster mushrooms and kai lan. If you've never seen oyster mushrooms, this is what they look like:

linmakingthings, miso, udon, vegetarian, recipe, Japanese, oyster mushrooms, Asian, umami

Gorgeous, right? Of course, you can include any kind of vegetables you like but remember to adjust your cooking time to make sure everything cooks evenly. I would recommend leafy greens like spinach or broccoli rabe, and enoki mushrooms and bean sprouts.

Continue reading for the full recipe.


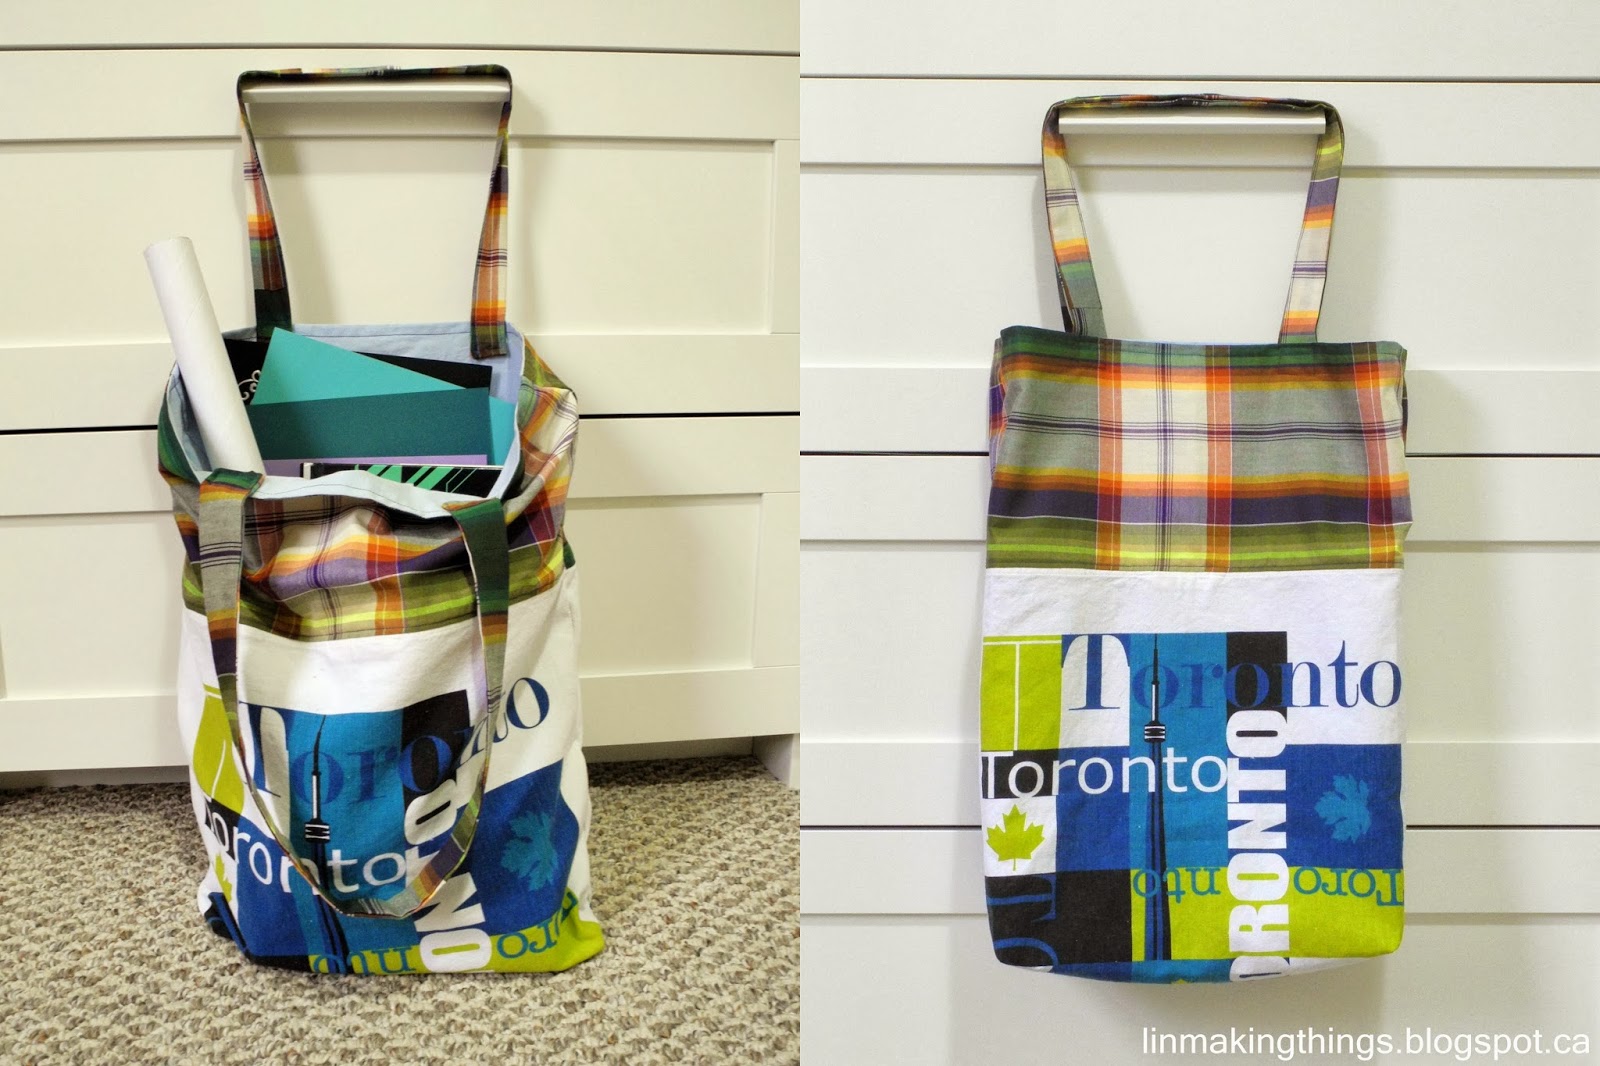
Tea towel jumbo tote bag - 100% repurposed materials!

Hang on to your pants because today's DIY is a triple threat!  This tea towel tote is made from three fabrics that all repurposed/recycled: a tea towel, an old bedsheet and some leftover fabric.

tea towel, tote bag, DIY, tutorial, upcycle, repurpose, linmakingthings

I love tote bags for the obvious reason that it's the environmentally friendly alternative to plastic bags. They can also be easily folded and stuffed into my purse when I'm hurrying out the door. Plus, having all your shopping in one bag is so much more convinient than hefting half a dozen paper or plastic bags! I used to feel weird when I started refusing plastic bags during checkouts but now I feel quite confident telling the cashier, "I don't need a bag, thank you,"especially when I whip out my well-worn canvas tote bag. The one I'm using right now is at least 3 years old; it's tremendously gratifying to think about all the plastic I've avoided using with just one single bag!

tea towel, tote bag, DIY, tutorial, upcycle, repurpose, linmakingthings

I must have browsed a dozen tutorials on how to sew a tote bag. I got even more excited when I realized I have materials I can repurpose into a bag. The tea towel is a mystery in that it's one of those things that's been laying about the house and no one in my family is 100% sure where it came from. We believe my brother bought it on an impulse (albeit, a weird impulse) during one of his trips to downtown Toronto, but we have yet to confirm that. The bedsheet is an old one from my own bed. The colour has gone from pale blue to even paler lifeless blue so I replaced it with a new one (in the exact same colour, I now realize...); but still, I couldn't bring myself to simply throw away all that fabric so I decided to dice it up and use as lining material. I wanted a jumbo-sized tote bag so I extended the height of the bag with some fabric, also from my scrap box. The extension fabric is actually from an old sarong and the tartan-like motif happened to match my tea towel quite perfectly.

tea towel, tote bag, DIY, tutorial, upcycle, repurpose, linmakingthings

Note: I took the extra step of sewing box corners for this bag; box corners give the bag dimension and a flat bottom, which I think is necessary for a bag this size. But it is optional and you can skip it if you like (Sew4home has detailed instructions on sewing boxed corners here).

tea towel, tote bag, DIY, tutorial, upcycle, repurpose, linmakingthings

 Read on after the jump for the full picture tutorial.

Thursday, December 12, 2013

Jazzed up veggie sandwich

honey mustard, pickled ginger, Japanese, vegetarian

Toasted fresh veggie sandwich with honey mustard and pickled ginger. How does that sound? Delish, I know. I love fresh veggie sandwiches because they're easy to make and can be quickly customized to suit your tastebuds. There's an infinite number of ways you can tweak the flavours with different breads, spreads, vegetables and relishes. My mom bought pickled ginger a while ago - the type you get with your sushi - and I've been experimenting with it as a topping. I found that it complements the mellow mozzarella and sweet honey mustard perfectly.

If you love sandwiches (like me!) and you're looking to try new flavours, give this combination a try!

Wednesday, December 11, 2013

Easy stir-fried udon

http://linmakingthings.blogspot.ca, udon, stir-fry, vegetarian, Japanese

Confession: this may be the start of yet another food obsession. I had udon in miso soup at an Asian supermarket's cafetaria a few weeks ago and I was absolutely smitten. The broth was simple and loaded with rich umami flavour and the fat udon noodles did a great job of carring the flavors. Plus the weather was pretty cold that day so some warm noodle soup felt just perfect!

Udon noodles are made from wheat and they come in several forms - dry, partially cooked or frozen. I opted for partially cooked udon, which can be thrown in straight into the pan without prior cooking or thawing. I whipped up an experimental batch with beef and oyster mushrooms when we had guests last week - which was quite a gamble! - but they turned out great. So tonight I decided to make some with egg tofu and gai lan (Chinese greens which resemble broccoli rabe but not at all bitter). I added the egg tofu for protein but it's optional - you can substitute it with regular tofu or skip it altogether. I must warn you, though, that egg tofu is quite delicate so handling it might take some extra effort.

http://linmakingthings.blogspot.ca, noodles, recipe, vegetarian, Japanese
 
As usual, this is a really easy dish to make. You can customize the veges and proteins according to your liking and no special skills are required besides chopping. With only a handful of ingredients,  you'll have a hot plate of noodles in less then 20 minutes!

Read on after the jump for the full recipe.


Easy stir-fried udon with egg tofu and gai-lan
Ingredients:
2 packets of cooked udon
1 tube of egg tofu, cut into 1/4" pieces
1/4 cup shredded cabbage
1/4 cup sliced sweet bell peppers
5-6 stems of gai-lan
1 tbs light soy sauce
1 tbs sweet soy sauce
pepper to taste
2 tbs oil and extra for frying tofu

http://linmakingthings.blogspot.ca, Japanese, udon, vegetarian, recipe

Directions:
1. Wash and drain gai-lan. Separate the leaves from the stems. Place the leaves in a stack and chop in half. Slice the stems into 1/4" lengths.
2. In a small pan, heat about 1/2" of oil over medium-high heat. Fry egg tofu slices until golden brown on both sides. Drain on paper towels.
3. In a medium skillet, add the 2 tablespoons of oil and bring to medium-high heat. Add all vegetables except gai-lan leaves. Stir-fry until slightly wilted, about 2 minutes.
4. Add noodles, gai-lan leaves, light soy sauce, sweet soy sauce and pepper. Stir well to combine for about 3 minutes. Turn off heat, adjust seasoning if necessary, add fried egg tofu and stir gently to distribute. Serve hot.

Serves 2-3 people.

Tuesday, December 3, 2013

Woven Ribbon-wrapped Bangles

linmakingthings, ribbon, woven ribbon, ribbon wrapped, DIY, jewelry, accessory

I'm not over the craze of upcycling thrifted plastic bangles, apparently. I usually go to thrift stores to get my fresh supply of vintage beads but, nowadays, plastic bangles are the first things I see. Like my Embroidery Thread Wrapped bangles project, this one took only three materials and about fifteen minutes to make.

linmakingthings, ribbon, woven ribbon, ribbon wrapped, DIY, jewelry, accessory

I already had a duo-toned ribbon on hand but you can opt to use two different coloured ribbons. The bangles came in a set of three for just $1.99. Altogether, I estimate the cost of these bangles came to about $5.00. Awesome, right? Check out the full picture tutorial if you'd like to give this a try.

linmakingthings, ribbon, woven ribbon, ribbon wrapped, DIY, jewelry, accessory


Saturday, November 23, 2013

Fennel au gratin


Winter is here! Well, the first snow fall is, at least. I woke up this morning to a flurry of snowflakes and immediately thought, "Comfort food time!" Although it's now bright and sunny again, I could still use some cheering up and there's a fennel waiting in my fridge, so fennel au gratin it is. Nothing says warm and comforting better than something cheesy and baked. Anything au gratin is fine by me but - and this might not be everyone's cup of tea - I personally love fennel because it's slightly fiberous and aniseed-y in flavour. This dish takes a little bit of effort and TLC but I always feel it's worth it by the time I'm bundled up in a blanket on the couch with a warm plate of gratin and hot mug of tea. Mmmm.


Read on after the jump for the recipe!

Wednesday, November 20, 2013

Tomato Salsa with Calamansi Orange


I've been told that this is pico de gallo, but after researching various ways of making pico de gallo, I can assure you that this isn't pico de gallo. I'm not sure how this came about but my family calls this "salsa" although, after researching various ways of making salsa, this is certainly not salsa either. Nevertheless, it is one of my family's favourite side dishes. I first came across this recipe in a food/travel show on Discovery channel hosted by Padhma Lakshmi. She was visiting a papadum factory and at the end of the show, they served this concoction as a simple way to enjoy papadums. 


This recipe is exactly the same one I saw in that episode - it's so easy and simple that I didn't even need a pen and paper to write it down. All it takes is prepping the ingredients, chopping them and mixing everything together.


I used calamansi oranges because they're a little sweeter and more fragrant, but you can use any kind of lime juice you have on hand. This salsa is also really dynamic - you can serve it alongside savoury rice dishes like biryani or pilau, or as dips for papadums, chips or nachos.


Alternatively, you can spoon the salsa onto nacho chips, sprinkle grated cheddar overtop, place them under the broiler for 3-4 minutes and serve on a platter.

Continue reading after the jump for the super easy recipe.