Thursday, December 19, 2013
Jump ring bracelet - 100% thrift store inspired!
I have to credit my favourite thrift/beading supply store for this clever and incredibly simple DIY. I bought this cute blue ombre plastic bead necklace from Value Village for $1.99, which is a steal considering how many beads there are on this one necklace. On my next visit I saw this interesting little bracelet made all out of jump rings. I didn't purchase the bracelet because it wasn't entirely to my taste but I took a picture of it so that I can replicate it with my own choice of beads. The project was so much fun and easy to make that I made several in one sitting!
This is, by far, the easiest jewelry I've made; it didn't need any chains, wires, or crimps. All I used were jump rings in 2 sizes, clasps and beads. If you're a beginner, I would recommend starting with this project to get a hang of handling jump rings and tools like pliers.
Check out the tutorial on how to make this jump ring bracelet.
Wednesday, December 18, 2013
Puzzle trinket box - from repurposed photo frame protective corners
Here's a quick little DIY you can make in about fifteen minutes or less. I repurposed 4 cardboard corners and decorated them with some washi tape and dollar store alphabet stickers. As usual, I've had these photo frame cardboard corners in my scrap box for a while before I discovered what I can do with them.
The four corners fit into each other quite nicely like a puzzle, but one simple enough for my five-year-old niece Zara to solve. Plus, since the puzzle forms a box, I decided to store a little surpirse in it for her!
I added the alphabet stickers so she can disassemble the puzzle and spell her name.
Check out the photo tutorial if you'd like to see how I made this quick but ingenious little DIY!
P/S: I also made a trinket box for my little niece Dina with a used plastic box. Here it is:
Labels:
cardboard,
DIY,
puzzle,
repurpose,
toddler,
toy,
Trinket box,
upcycle,
washi tape,
Zara
Tuesday, December 17, 2013
Miso udon - a warm and hearty noodle soup, Japanese style!
As I've warned you before, my udon obsession has just started. I had this miso udon at a cafetaria a while back and I thought it was the perfect comfort food - vegetarian, warm broth, hearty noodles and rich umami flavour. As with most of my recipes, this one takes less than fifteen minutes to cook with minimal preparation.
There are different types of miso - white miso, red miso - and it's made by fermenting soy beans. Miso is relatively salty with a rich back-of-the-pallet flavour which I can best describe as umami. Miso has also been claimed as a superfood; it's rich in protein and the fermentation process fills the miso with live, healthy bacteria. As such, miso shouldn't be overcooked; rather, most recipes I looked at required turning off the heat before finally adding miso.
I postponed making this for over a week because I forgot to buy kombu flakes, which I need in order to make dashi stock, which I need to make miso soup. But then I took a closer look at the packaging and I realized that the miso paste I bought already had dashi in it. According to one website, dashi type miso is the best way to make authentic miso soup. Problem solved! So, if you're a beginner like me, I would advice getting dashi type miso and save yourself the extra step of making dashi stock.
Miso udon is generally served with just some nori, spring onions and tofu. I wanted to make this into a proper meal so I added some oyster mushrooms and kai lan. If you've never seen oyster mushrooms, this is what they look like:
Gorgeous, right? Of course, you can include any kind of vegetables you like but remember to adjust your cooking time to make sure everything cooks evenly. I would recommend leafy greens like spinach or broccoli rabe, and enoki mushrooms and bean sprouts.
Continue reading for the full recipe.
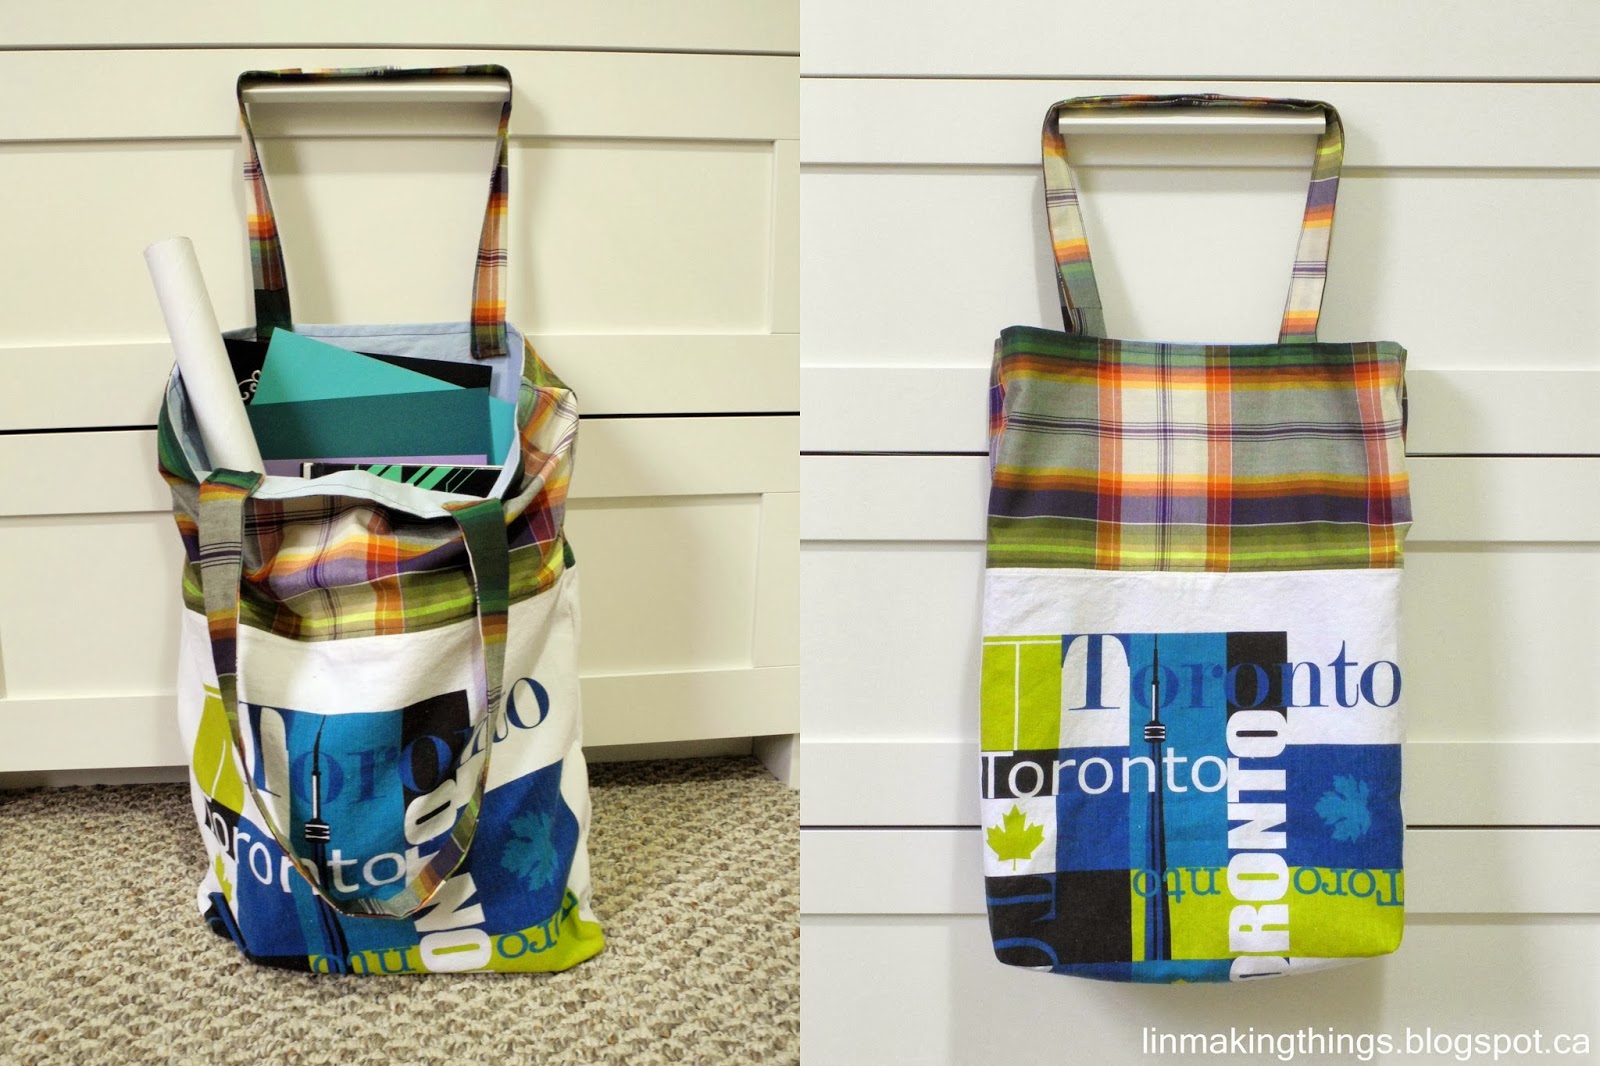
Tea towel jumbo tote bag - 100% repurposed materials!
Hang on to your pants because today's DIY is a triple threat! This tea towel tote is made from three fabrics that all repurposed/recycled: a tea towel, an old bedsheet and some leftover fabric.
I love tote bags for the obvious reason that it's the environmentally friendly alternative to plastic bags. They can also be easily folded and stuffed into my purse when I'm hurrying out the door. Plus, having all your shopping in one bag is so much more convinient than hefting half a dozen paper or plastic bags! I used to feel weird when I started refusing plastic bags during checkouts but now I feel quite confident telling the cashier, "I don't need a bag, thank you,"especially when I whip out my well-worn canvas tote bag. The one I'm using right now is at least 3 years old; it's tremendously gratifying to think about all the plastic I've avoided using with just one single bag!
I must have browsed a dozen tutorials on how to sew a tote bag. I got even more excited when I realized I have materials I can repurpose into a bag. The tea towel is a mystery in that it's one of those things that's been laying about the house and no one in my family is 100% sure where it came from. We believe my brother bought it on an impulse (albeit, a weird impulse) during one of his trips to downtown Toronto, but we have yet to confirm that. The bedsheet is an old one from my own bed. The colour has gone from pale blue to even paler lifeless blue so I replaced it with a new one (in the exact same colour, I now realize...); but still, I couldn't bring myself to simply throw away all that fabric so I decided to dice it up and use as lining material. I wanted a jumbo-sized tote bag so I extended the height of the bag with some fabric, also from my scrap box. The extension fabric is actually from an old sarong and the tartan-like motif happened to match my tea towel quite perfectly.
Note: I took the extra step of sewing box corners for this bag; box corners give the bag dimension and a flat bottom, which I think is necessary for a bag this size. But it is optional and you can skip it if you like (Sew4home has detailed instructions on sewing boxed corners here).
Read on after the jump for the full picture tutorial.
Thursday, December 12, 2013
Jazzed up veggie sandwich
Toasted fresh veggie sandwich with honey mustard and pickled ginger. How does that sound? Delish, I know. I love fresh veggie sandwiches because they're easy to make and can be quickly customized to suit your tastebuds. There's an infinite number of ways you can tweak the flavours with different breads, spreads, vegetables and relishes. My mom bought pickled ginger a while ago - the type you get with your sushi - and I've been experimenting with it as a topping. I found that it complements the mellow mozzarella and sweet honey mustard perfectly.
If you love sandwiches (like me!) and you're looking to try new flavours, give this combination a try!
Subscribe to:
Posts (Atom)