Showing posts with label jewelry. Show all posts

Wednesday, October 2, 2013

Upcycle a photo frame into a jewelry organizer!


So here's another DIY project I have had in my Ideas folder for, like, forever. Although I love upcycling things I have lying around and the frame looks really cute, I put it off because I already had a jewelry organizer. My dad had artfully installed hooks and nails on the side of my old dresser and that's where I've been storing my bracelets, bangles and necklaces. Last month, however, I replaced the dresser with a new one, so there goes my jewelry organizer. And so came the reason to make a new organizer!

All I used were an old (and not very pretty) photo frame, a cork board (which I salvaged from my previous study), spray paint and some nails.


I first removed the frame and spray-painted it white to match the rest of my room's furniture. I applied two coats of paint to get the finished surface I wanted. When reassembling the frame, I discarded the frame's glass plate and put the cork board in its place. My cork board happened to fit the frame perfectly, so no cutting or trimming was necessary. Finally, I hammered several *nails in a zig zag pattern from which to hang my necklaces.


It's that simple!

Now, I not only have an easily accessible organizer for my necklaces but I also made a functional wall art that fits my room's deco. Winning!


Click here to see what I did with the simple mirror below for some aesthetic appeal.


*I originally used thumbtacks but they weren't long enough to hold more than one necklace each so I upgraded to some nails.

Wednesday, September 25, 2013

Upcycle thrifted plastic bangles with jewel-toned embroidery thread!


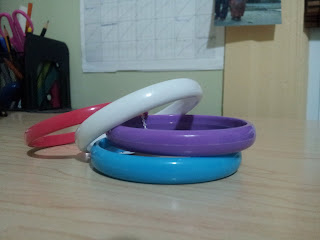
My sister sent me a picture of some embroidery thread-wrapped bangles over a year ago and challenged me to make some of my own. I don't know why but I was intimidated by them and didn't attempt to make them until recently. As it turns out, they are SO easy to make! You literally only need three materials for this DIY project: plastic bangles, embroidery thread and glue. 


I chose a set of four bangles which I bought from Value Village for $1.99 (score!) and embroidery threads in three shades. I wrapped two bangles in solid maroon and pink threads while the other two I wrapped in alternating stripes of maroon, pink and red.


To start wrapping, I dabbed some glue onto the inner ring of the bangle and pressed down one end of the thread. I glued about half an inch of thread to the bangle to make sure it's secure. After the glue has dried (about 1-2 minutes) I began wrapping the thread back over the glued end and onwards until I ran out of thread. To continue with a new length of thread, I made sure to glue it onto the bangle and wrap the previous length of thread over it to make sure it's secure (again). I then knotted the previous length of thread and continue wrapping with the new piece of thread over the knot to hide it. To end, I knotted the thread, dabbed some glue on it, let it dry and then snip off the access thread.


The results was pretty impressive; for a simple DIY, the bangles came out looking quite elegant, especially with the jewel-toned threads.


These were so much fun to make, I might just run over to the thrift store and grab some more plastic bangles!