Showing posts with label sewing. Show all posts

Tuesday, April 22, 2014

Pullover make-over


This pullover certainly came close to disposal. I bought it at Value Village (where else, right?) for about $7-$8. It was the start of winter and I was looking for something warm to wear around the house, and the orange colour (my favourite!) immediately caught my eye. Unfortunately I discovered I'm not a big fan of pullovers; cardigans are more my thing so I contemplated donating it back to VV. Fortunately, I found a tutorial on how to turn an old pullover into a cardigan over at Happiness is...creating and, well, suffice it to say that this orange number is back in my closet.


I started with the tutorial and added my own embellishments. Instead of seam binding, I used twill tape, which I feel are a little strudier and suited to something I'm going to wear a lot. Since the material is thick cotton wool blend, I would suggest using a tape or ribbon that's at least 1" wide. I also added pockets (for practical reasons!) cut out from an old bed sheet and a heart appliqué (why not, right?) from some left over fabric. The result was a slouchy cardigan I can quickly throw on when I'm curling up on the sofa and take off when I'm doing dishes.

Check out the tutorial and see if you can do this to one of your old sweaters!

Sunday, March 9, 2014

Bento tote bag


Boy, have I been busy these past few weeks! I've actually been making things in the pockets of time I've had in my busy schedule. I just couldn't find the time to blog about them, which is a tragedy! So here's my first one for March: a bento tote bag!

I found the tutorial for this incredible easy tote bag last year but neglected to note the website or the name of this particular design. I had to do a few hours of online 'investigative research' (re: endlessly scrolling through pictures of DIY tote bag designs) until I found the original blog post. I also discovered that there several different ways of constructing it. Between The Lines calls it the "wings" tote because the construction resembles a pair of wings folded upwards to form a bag. I went with Pretty Prudent's 'bento' tote bag, which I found to be much easier for beginners, but modified it to fit my needs. Check out both their posts to see which method appeals to you.

bag, tote, DIY, fashion, sewing, bento, Lin Making Things

It took me about 30 miniutes to make my first one - which turned out PERFECT! - and I've been using it as my go-to carry-all for a few weeks now. There are a few different ways to construct and finish the bag - lined or unlined; flat, angled or boxed corners; single compartment or with pockets; short or long handles. I chose to line mine with an old bed sheet and finish it with boxed corners and a eight-inch handle from some thick cotton canvas.

bag, tote, DIY, fashion, sewing, bento, Lin Making Things

 The great thing about this bag is that it's easy enough that you could experiment with it on a scaled down version (which is what I did for this tutorial) in order to understand the construction and modify it to suit your taste. Since there are only straight stitches involved, you can certainly spend  a little bit more time hand-stitching the bag if you want.

Check out how you can make this bento tote bag yourself after the jump.

Saturday, February 1, 2014

Tea towel pillow case

tea towel, pillow case, DIY, tutorial, sewing, linmakingthings, repurpose

It's starting to look as though I've developed an obsession with tea towels, doesn't it? Well, I can't help it! They come in such fun colours and motifs, they're sturdy and their edges are all neatly hemmed. And when they go on clearance at Ikea, tea towels are impossible to resist! They also beat buying yards of fabric only to end up with bits and pieces that I can't really use for anything.


I've been wanting to give my throw pillow a makeover, so when I got these tea towels, I just played around and wrapped one around my pillow. Et voila! I discovered that I can make a pillow case out of this tea towel with just three lines of stitches and a button. It took me less than 30 minutes to make this pillow case. How easy is that?

tea towel, pillow case, DIY, tutorial, sewing, linmakingthings, repurpose

This project is perfect for beginners since you only have to sew a few lines of straight stitches and you don't have to worry about measuring, cutting patterns, serging frayed edges or attaching zippers. It's also completely doable without a sewing machine. Do note, though, that this project requires a tea towel with a built-in loop and it makes a 12"x18" pillow case for a standard throw pillow.

Read on after the jump for the full picture tutorial.

Thursday, January 23, 2014

Onesie dresses - make your own with onesies and fat quarters!

As usual, this DIY is a marriage between some plain items and some unused materials. My mom and I were looking for some baby gifts and we settled on these cute little onesies to make into dresses. Then my mom remembered the set of fat quarters that she never got around to making into a quilt. So I decided try this refashion DIY project and turn the plain onesies into adorable little onesie dresses with the fat quarters.

onesie, dresses, baby dresses, quilting, fat quarters, DIY, linmakingthings

Fat quarters are 18"x22" precut quilting fabric pieces. If you don't have any fat quarters, you can simply cut any fabric of your choice to size. You can also adjust the width and length of the fabric to fit the size of your onesies. I used 9-month for this project.

Read on after the jump for the full photo tutorial.

Saturday, January 4, 2014

Two-toned infinity scarf - from upcycled pashminas


So this is what happens when you buy things on impulse. I wear the hijab and I have a pronounced weakness when it comes to scarves. One of my ongoing quests is to reduce the number of scarves I buy because, really, I don't need that many. These two pashminas are the result of an impulse buy several years back. The colours are pretty but the materials is far too coarse for me to wear around my face so they've been sitting dormant in my drawer.


I decided to turn them into an infinity scarf after stumbling upon a few Youtube tutorials and seeing how easy it is to make one. Plus, I've also been craving for a new infinity scarf since winter set in. The two pashminas combined made a four-layer thick infinity scarf. Two days ago, when temperatures in Toronto dropped to almost thirty below, this scarf did its job in keeping my neck warm and toasty. It also doubled as a heavy hood which didn't flip too easily in gusty winds.

Because of the double layers, there's a few extra steps in this tutorial as opposed to making a regular infinity scarf. You can totally do this with just one pashmina for a thinner infinity scarf. Also, the final step of turning the finished scarf inside out can be a bit nerve-wrecking, but don't panic. Just keeping pulling and it'll all come together at the end!

Check out the full picture tutorial after the jump.

Tuesday, December 17, 2013

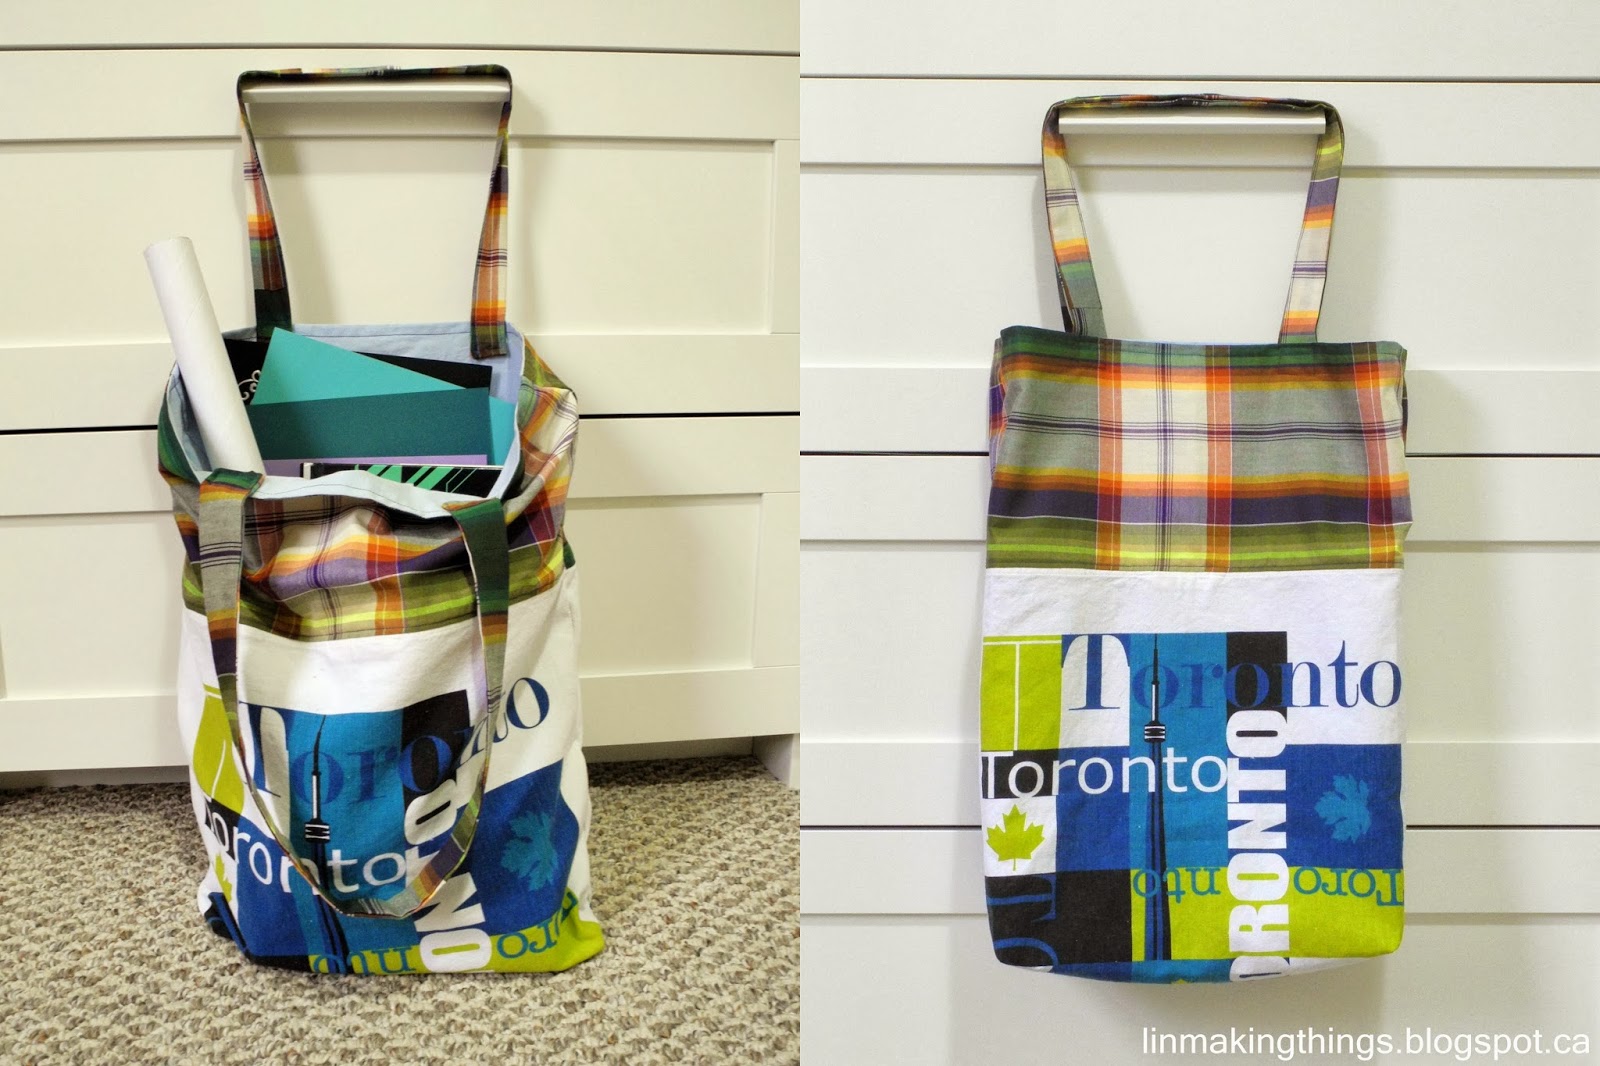
Tea towel jumbo tote bag - 100% repurposed materials!

Hang on to your pants because today's DIY is a triple threat!  This tea towel tote is made from three fabrics that all repurposed/recycled: a tea towel, an old bedsheet and some leftover fabric.

tea towel, tote bag, DIY, tutorial, upcycle, repurpose, linmakingthings

I love tote bags for the obvious reason that it's the environmentally friendly alternative to plastic bags. They can also be easily folded and stuffed into my purse when I'm hurrying out the door. Plus, having all your shopping in one bag is so much more convinient than hefting half a dozen paper or plastic bags! I used to feel weird when I started refusing plastic bags during checkouts but now I feel quite confident telling the cashier, "I don't need a bag, thank you,"especially when I whip out my well-worn canvas tote bag. The one I'm using right now is at least 3 years old; it's tremendously gratifying to think about all the plastic I've avoided using with just one single bag!

tea towel, tote bag, DIY, tutorial, upcycle, repurpose, linmakingthings

I must have browsed a dozen tutorials on how to sew a tote bag. I got even more excited when I realized I have materials I can repurpose into a bag. The tea towel is a mystery in that it's one of those things that's been laying about the house and no one in my family is 100% sure where it came from. We believe my brother bought it on an impulse (albeit, a weird impulse) during one of his trips to downtown Toronto, but we have yet to confirm that. The bedsheet is an old one from my own bed. The colour has gone from pale blue to even paler lifeless blue so I replaced it with a new one (in the exact same colour, I now realize...); but still, I couldn't bring myself to simply throw away all that fabric so I decided to dice it up and use as lining material. I wanted a jumbo-sized tote bag so I extended the height of the bag with some fabric, also from my scrap box. The extension fabric is actually from an old sarong and the tartan-like motif happened to match my tea towel quite perfectly.

tea towel, tote bag, DIY, tutorial, upcycle, repurpose, linmakingthings

Note: I took the extra step of sewing box corners for this bag; box corners give the bag dimension and a flat bottom, which I think is necessary for a bag this size. But it is optional and you can skip it if you like (Sew4home has detailed instructions on sewing boxed corners here).

tea towel, tote bag, DIY, tutorial, upcycle, repurpose, linmakingthings

 Read on after the jump for the full picture tutorial.

Thursday, October 24, 2013

Whimsy-fy a vintage blouse (with a ruffled hem!)


I love simple designs with little whimsical embelishments.I was online window shopping a few weeks ago when I stumbled upon this dainty little number and instantly fell in love.


I won't say where I found it or how much it cost (hint: somewhere around an arm and a leg) but suffice it to say that my reaction was, "Hey, I can make that for SO much less!" And so I did. I happened to have a Victorian-esque blouse with sumptuously puffed sleeves that I bought for an absolute bargain at a local vintage store, Netty Vintage. I can't remember the exact price but I'm 100% sure it wasn't more than $15. Then I simply headed over to my local crafts store to get a matching fabric for the ruffle and voila!


Vintage blouse whimsy-fied!

This is the first major refashion project I've done and I'm quite happy with the way it turned out.The stitching is a bit messy because I'm still a newbie on the sewing machine but you can hardly tell from afar. What's important was that the ruffled hem was in place, my blouse now has the whimsical touch I was aiming for, my wardrobe has something new, so I'm happy!

Full tutorial (with pictures!) after the jump.