Showing posts with label upcycle. Show all posts

Tuesday, April 8, 2014

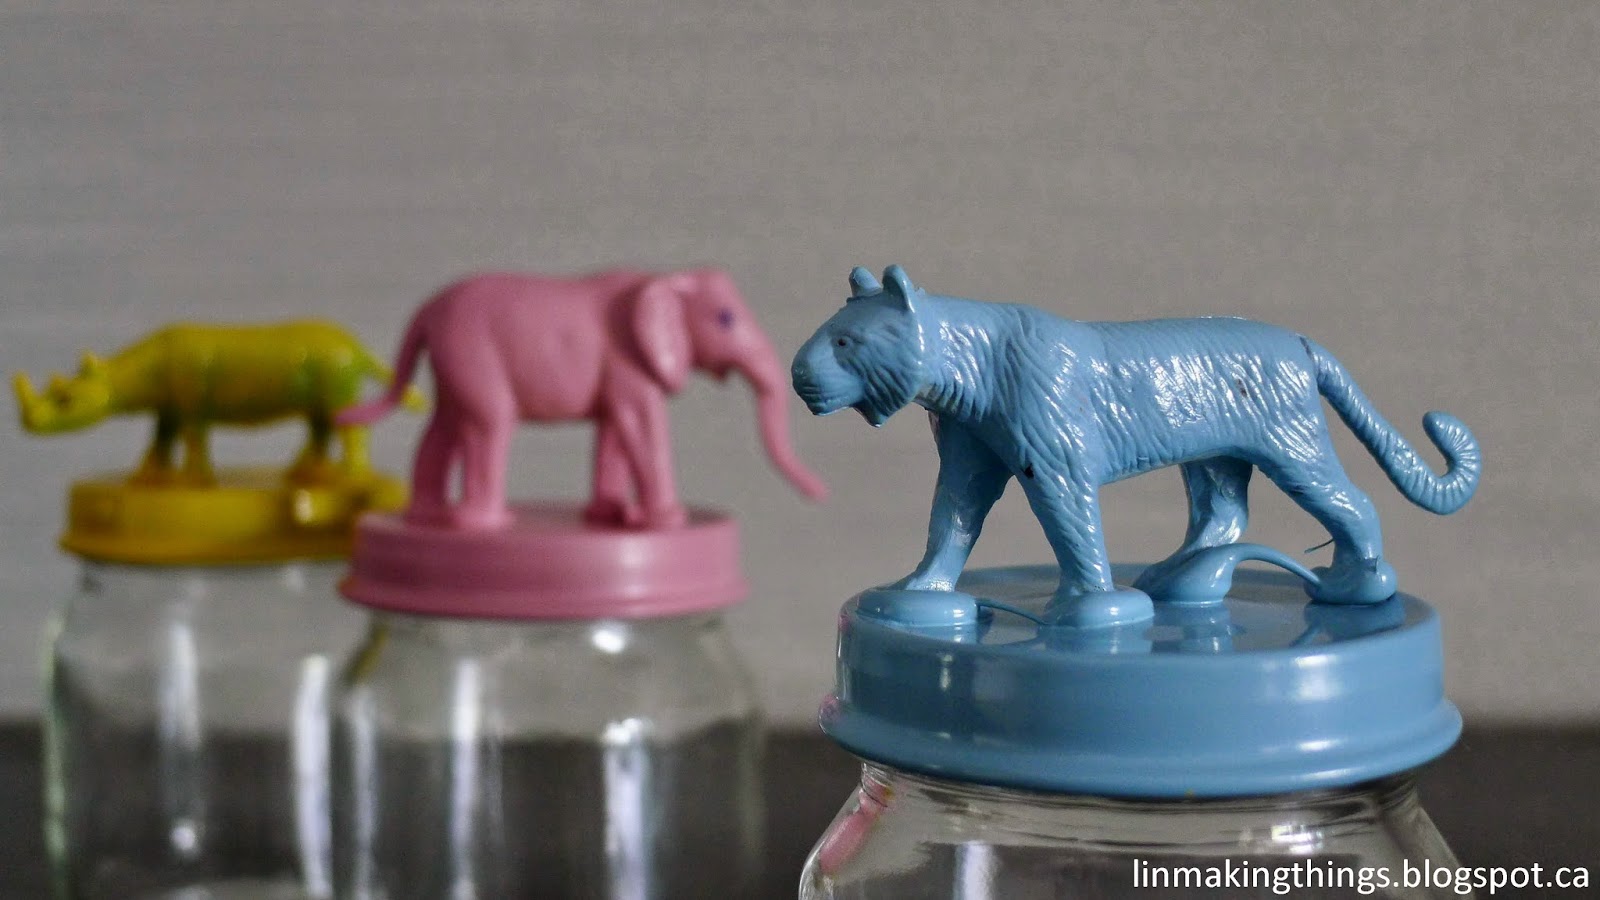
Creature feature jars

Guest post by Nani a.k.a. Crafty Momma

If you're a compulsive jar-hoarder like my sister, you'll like this easy little DIY project.


With a few simple materials and just 30 minutes, you'll have a pretty set of decorative jars that's great for storage or as cute gifts. My sister made hers as a farewell gift and filled the jars with chocolates. You can add a little more feature with complimentary tags or ribbons tied around it.

Read on after the jump for the full tutorial.

Creature Feature jars
What you need:
1. Empty jars
2. Hot glue gun
3. Plastic animals
4. Spray paint


Instructions:
1. Clean your jars and their lids, remove any stickers or residue and wipe dry.
2. Attach the plastic animals onto the lids using your hot glue gun. Let the glue dry completely.


3. Once the glue has dried completely, you can start spray painting the lids with your choice of colours. To get an even and opaque finish, apply 2-3 coats of paint. Alternatively, you can apply a single layer or paint and let some of the animals' texture show through.


4. Let the paint dry completely. Put the lids back onto the jars and voila! You have new upcycled jars.


Have fun making them!

Wednesday, December 18, 2013

Puzzle trinket box - from repurposed photo frame protective corners

linmakingthings, photo frame, cardboard, DIY, toy, puzzle, trinket, upcycle, repurpose, washi tape

Here's a quick little DIY you can make in about fifteen minutes or less. I repurposed 4 cardboard corners and decorated them with some washi tape and dollar store alphabet stickers. As usual, I've had these photo frame cardboard corners in my scrap box for a while before I discovered what I can do with them.

linmakingthings, photo frame, cardboard, DIY, toy, puzzle, trinket, upcycle, repurpose, washi tape

The four corners fit into each other quite nicely like a puzzle, but one simple enough for my five-year-old niece Zara to solve. Plus, since the puzzle forms a box, I decided to store a little surpirse in it for her!

linmakingthings, photo frame, cardboard, DIY, toy, puzzle, trinket, upcycle, repurpose, washi tape

I added the alphabet stickers so she can disassemble the puzzle and spell her name.

linmakingthings, photo frame, cardboard, DIY, toy, puzzle, trinket, upcycle, repurpose, washi tape

Check out the photo tutorial if you'd like to see how I made this quick but ingenious little DIY!

P/S: I also made a trinket box for my little niece Dina with a used plastic box. Here it is:

linmakingthings, photo frame, cardboard, DIY, toy, puzzle, trinket, upcycle, repurpose, washi tape

Tuesday, December 17, 2013

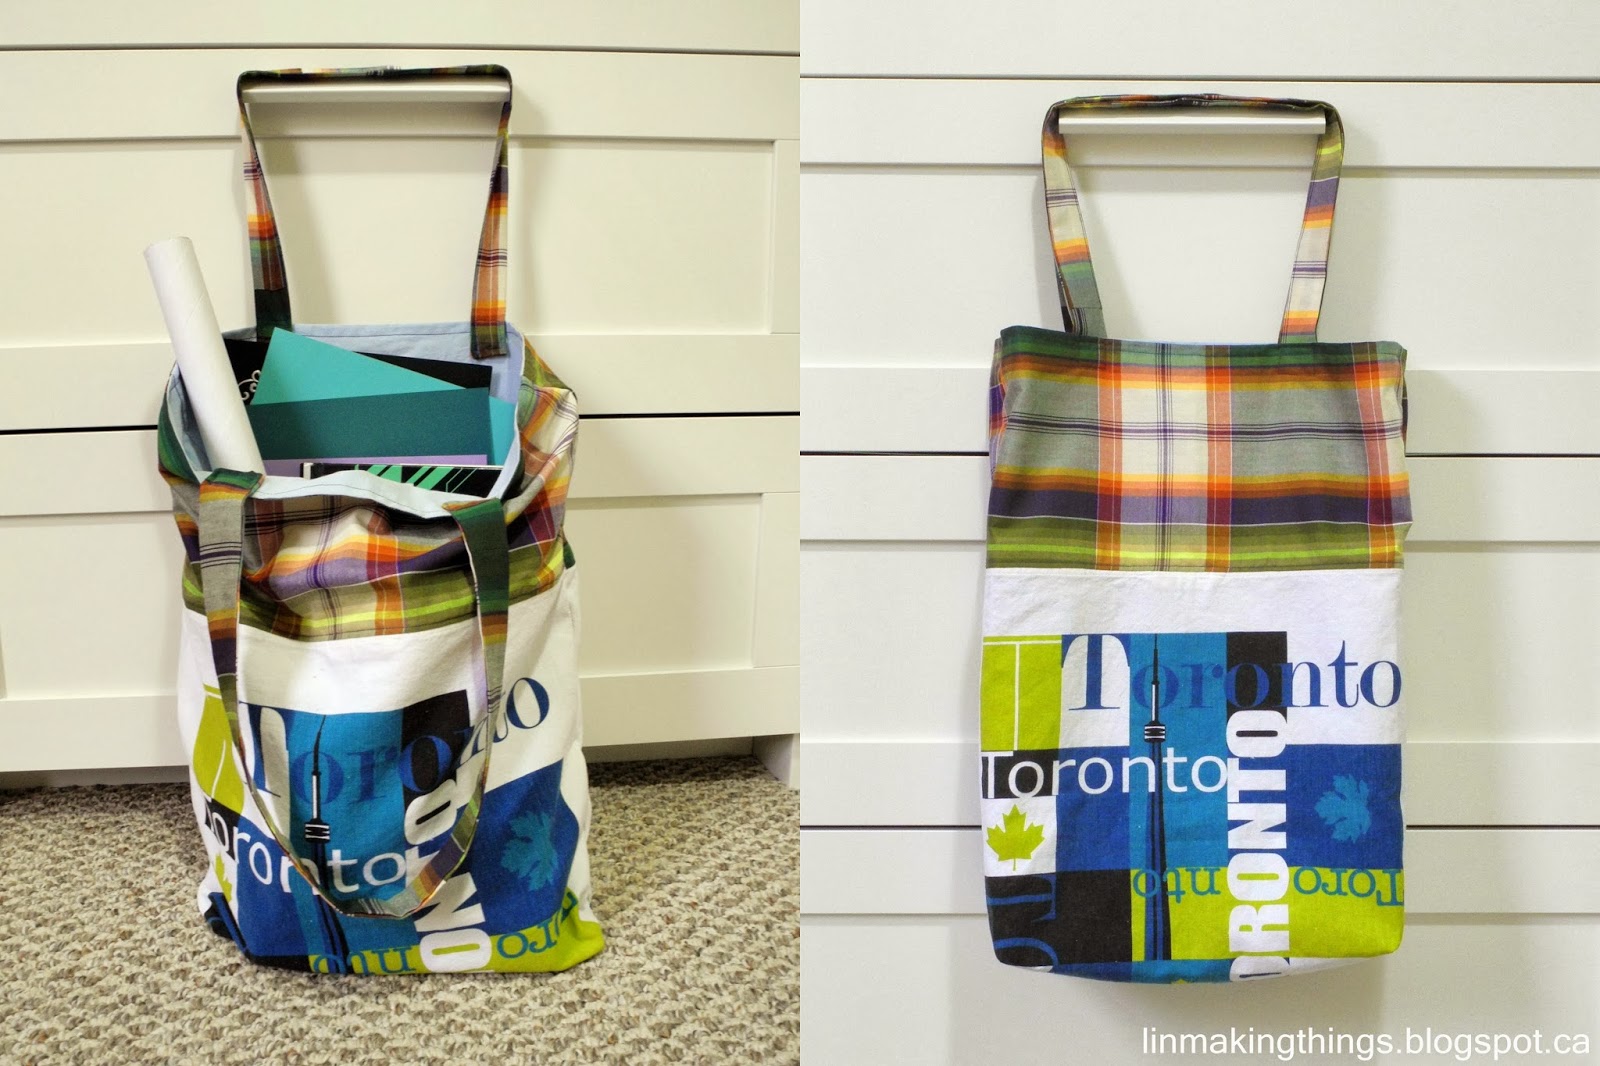
Tea towel jumbo tote bag - 100% repurposed materials!

Hang on to your pants because today's DIY is a triple threat!  This tea towel tote is made from three fabrics that all repurposed/recycled: a tea towel, an old bedsheet and some leftover fabric.

tea towel, tote bag, DIY, tutorial, upcycle, repurpose, linmakingthings

I love tote bags for the obvious reason that it's the environmentally friendly alternative to plastic bags. They can also be easily folded and stuffed into my purse when I'm hurrying out the door. Plus, having all your shopping in one bag is so much more convinient than hefting half a dozen paper or plastic bags! I used to feel weird when I started refusing plastic bags during checkouts but now I feel quite confident telling the cashier, "I don't need a bag, thank you,"especially when I whip out my well-worn canvas tote bag. The one I'm using right now is at least 3 years old; it's tremendously gratifying to think about all the plastic I've avoided using with just one single bag!

tea towel, tote bag, DIY, tutorial, upcycle, repurpose, linmakingthings

I must have browsed a dozen tutorials on how to sew a tote bag. I got even more excited when I realized I have materials I can repurpose into a bag. The tea towel is a mystery in that it's one of those things that's been laying about the house and no one in my family is 100% sure where it came from. We believe my brother bought it on an impulse (albeit, a weird impulse) during one of his trips to downtown Toronto, but we have yet to confirm that. The bedsheet is an old one from my own bed. The colour has gone from pale blue to even paler lifeless blue so I replaced it with a new one (in the exact same colour, I now realize...); but still, I couldn't bring myself to simply throw away all that fabric so I decided to dice it up and use as lining material. I wanted a jumbo-sized tote bag so I extended the height of the bag with some fabric, also from my scrap box. The extension fabric is actually from an old sarong and the tartan-like motif happened to match my tea towel quite perfectly.

tea towel, tote bag, DIY, tutorial, upcycle, repurpose, linmakingthings

Note: I took the extra step of sewing box corners for this bag; box corners give the bag dimension and a flat bottom, which I think is necessary for a bag this size. But it is optional and you can skip it if you like (Sew4home has detailed instructions on sewing boxed corners here).

tea towel, tote bag, DIY, tutorial, upcycle, repurpose, linmakingthings

 Read on after the jump for the full picture tutorial.

Tuesday, December 3, 2013

Woven Ribbon-wrapped Bangles

linmakingthings, ribbon, woven ribbon, ribbon wrapped, DIY, jewelry, accessory

I'm not over the craze of upcycling thrifted plastic bangles, apparently. I usually go to thrift stores to get my fresh supply of vintage beads but, nowadays, plastic bangles are the first things I see. Like my Embroidery Thread Wrapped bangles project, this one took only three materials and about fifteen minutes to make.

linmakingthings, ribbon, woven ribbon, ribbon wrapped, DIY, jewelry, accessory

I already had a duo-toned ribbon on hand but you can opt to use two different coloured ribbons. The bangles came in a set of three for just $1.99. Altogether, I estimate the cost of these bangles came to about $5.00. Awesome, right? Check out the full picture tutorial if you'd like to give this a try.

linmakingthings, ribbon, woven ribbon, ribbon wrapped, DIY, jewelry, accessory


Wednesday, October 2, 2013

Upcycle a photo frame into a jewelry organizer!


So here's another DIY project I have had in my Ideas folder for, like, forever. Although I love upcycling things I have lying around and the frame looks really cute, I put it off because I already had a jewelry organizer. My dad had artfully installed hooks and nails on the side of my old dresser and that's where I've been storing my bracelets, bangles and necklaces. Last month, however, I replaced the dresser with a new one, so there goes my jewelry organizer. And so came the reason to make a new organizer!

All I used were an old (and not very pretty) photo frame, a cork board (which I salvaged from my previous study), spray paint and some nails.


I first removed the frame and spray-painted it white to match the rest of my room's furniture. I applied two coats of paint to get the finished surface I wanted. When reassembling the frame, I discarded the frame's glass plate and put the cork board in its place. My cork board happened to fit the frame perfectly, so no cutting or trimming was necessary. Finally, I hammered several *nails in a zig zag pattern from which to hang my necklaces.


It's that simple!

Now, I not only have an easily accessible organizer for my necklaces but I also made a functional wall art that fits my room's deco. Winning!


Click here to see what I did with the simple mirror below for some aesthetic appeal.


*I originally used thumbtacks but they weren't long enough to hold more than one necklace each so I upgraded to some nails.